Are you aware of the vital importance of a shower tray? Do you know how to choose a shower tray that is well built and lasts over time? How to correctly position a shower tray to make the difference between an airtight bathroom that works without problems versus costly leaks?
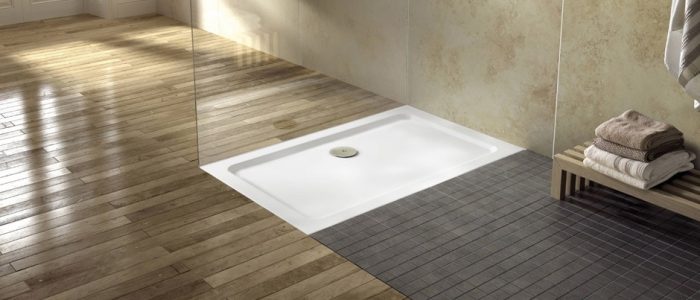
There are two types of shower tray: low-profile trays, designed to sit as close to the ground as possible; and the height-adjustable shower trays, which rest on adjustable feet.
Height-adjustable shower trays stand out because the height can be adjusted to the desired point and allows easier access to the lower pipes in case of leaks or replacement is necessary. Instead, if you are looking for step-free access to the shower, then you should go for a low-profile shower tray.
Also, if you install your new shower tray before cladding or finishing installing the walls, you will ensure a more watertight seal around all sides of your shower tray.
Thinking of buying a new shower tray for your bathroom? Here you can buy the shower tray, they are not very expensive and shipping is free.
How to install an adjustable height shower tray?
Position the shower tray where you want to install it and make sure it fits seamlessly into the space
Screw the legs into position and adjust the height of the shower tray to the desired level. Connect the drain outlet of the shower tray to ensure that everything is properly aligned.
Adjust the legs of the tray to allow the sink to work
The normal thing is to start by adjusting the corner legs first, not forgetting the central leg.
Find the best route to the drain
If the outlet pipe is already installed correctly, simply connect it to the sump.
Place the shower tray
After pre-installing the bottom of the drain to the pipe.
Use a spirit level to ensure the shower tray is level
We could say that this is one of the most important steps in the entire process. An uneven plate will cause drainage problems, causing water to collect on one side of the plate and eventually overflow. The shower trays are designed so that the water runs down the drain, so it is not necessary to tilt the tray.
Verify that all the legs are fixed
And that the locknuts are fully tightened and touching the flange.
Pour water from a pitcher over the drain
This will allow you to check that the shower drain works, that the water flows without drips or leaks.
Cover the gaps when installing a shower tray that you bought on the internet by yourself around the sides
Using skirting boards or side panels of the shower tray.
Use a bead of sealer on the back of the tray
To cushion the shower tray between the wall and the tray. Apply a bead of caulk along the top edge and the wall.
Lay the tiles
Leaving a gap of approximately 3mm. Run a drop between the bottom of the tile and the shower tray, making sure it penetrates the space. This sealing is crucial, as it will allow you to continue with the installation of the shower tray even without waiting for it to dry.
Cut the side panels to length
Attach the leg clamps where they belong before proceeding to the next step. You may need to attach slats to the floor to secure the panel.
How to install a low profile shower tray
The floor under the shower tray needs to be completely secure.
Place the tray wherever you want to install it and check that the floor is strong and solid enough to support it without risk.
If not, remove the floorboards from this area and replace them with marine plywood thicker than 20mm.
Cut the access hatch
This will help you more easily access the inside of the shower tray when it comes to plumbing maintenance. This type of shower tray does not leave space for the pipes between the base of the tray and the floor, so you will have to remove the pieces from the floor to make room for them.
Create a mortar by mixing construction sand and cement
Then carefully spread over the area where you are going to install the shower tray. Place the shower tray on top of it and make sure it is completely level with the help of a spirit level.
Let it dry for at least 24 hours
Use the access hatch to connect the drain to the outlet pipe and, in turn, connect the outlet pipe to the drain pipe under the shower tray.
Use a silicone sealant
To ensure that the seal is hermetic and secure around the contour of the tray.


