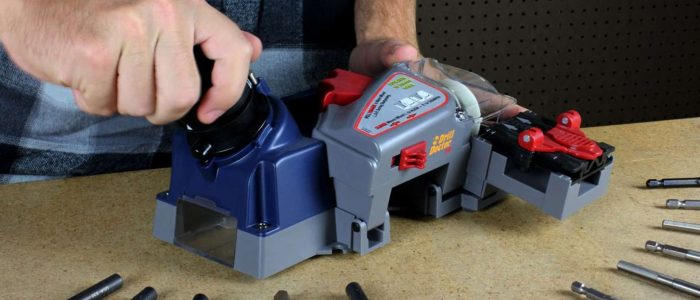
How to make the drill bits re-drill correctly? What materials are needed to sharpen a drill bit? What are the basic precautions we must take when restoring our bits?
Sharp bits are effective and useful. A poorly sharpened bit can break and cause serious damage.
Learn now how to sharpen your bits for safe drilling in no time ...
Understand your bit
Drill bits have a handful of features that are important to note. We can quickly highlight three essential characteristics in a drill: cutting lip, sharpening surface and guide.
The "lip" is the part that takes care of the cut. A bit typically has two helix-shaped lips, which must be symmetrical if a uniform cut is to be sought while drilling.
The surface is what follows the edge and is responsible for reinforcing the drilling task. While the guide is observed when both sides of the drill are crossed.
Understand why sharpening your bits is important
Drill bits often chip due to forces exerted during the drilling process. The bits need the curve shape to add support to the lip.
Dull bits are caused by problems with the material that must be refined to function properly. Or because the lip is bent and needs to be sharpened for the piercing operation to work well.
Prepare the bit
File the surface to remove any elements that may have emerged on the surface of the mouth. In this way, you prevent any residue of the material from cutting your skin during the process.
Choose your tool to sharpen bits
A drill sharpener or a sander can help sharpen bits. You simply need to make sure that you take the necessary protections so that the sharpening becomes a fast and efficient operation.
Practice supporting the drill
You can start from a comfortable hand position and rest the bit with both hands on the machine. Maintain a 60 degree angle to the face of the sander. Move the bit through the strap to the final position. Use your dominant hand as a guide for the bit and use the other to move the bit.
Polish the lip
Buff the surface by lifting your non-dominant hand while applying pressure to the sharpening device.
Shape the surface
When you move from left to right, you should also create the angle of the surface. Practice several times until the angle is 45 degrees.
Shape the guide
You will create a rounded guide that will give your lip more support by turning or rolling the bit counterclockwise.
Cut, shape and rotate
With these three movements during sharpening you can give a perfect cut on the face of the drill.
You will have to repeat this step a few times and turn the bit 180 degrees to sharpen both lips.
eye! This process causes the face of the bit to get very hot. Make sure you have a glass of cold water next to your workstation to dip the tip of the bit in and cool it down. Be careful to avoid overheating the bit, as the integrity of the steel may be weakening. It is important to keep the bit cool.
Repeat
It may take a while for both lips of the bit to be perfectly symmetrical. You just need to be patient. Persists.
If you've practiced a bit and been able to properly roll and mold the bit face and guide, it's time to drill! If drilling is still difficult, make sure both lips are symmetrical on the centerline of the bit. If you see chips coming out on both sides of the bit, go for it!


